Introduction
As a continuation of my series on reloading archaic cartridges I am going to discuss loading 11mm Chassepot ammo today. The Chassepot is a French breech-loading needle fire bolt action rifle from the 1860s. Although not as much of a revolution as the earlier Dreyse rifle it evolved from, it still represents an interesting bridge between muzzeloading rifles and bolt actions. It loads via the breech and fires a unique paper cartridge using a long thin “needle” to pierce the paper and hit a percussion cap igniting the main power charge. it fires a rather typical for the time 11mm bullet.
Obviously, given the age of this rifle and the unique ammo it uses, no commercial loadings are available. We must (literally) roll our own. As always you do this at your own risk. I am not an expert.
What You Need
- A bullet mold. I went with Accurate 46-365C, which is a reproduction of the original bullet.
- Black Powder FFg
- A 7/16 inch diameter dowel
- A 1/4 inch diameter dowel
- Basic white glue
- Cardboard (about 1/4 inch thick)
- CCI Four-Wing Musket Caps, although I suspect any caps will do.
- Some thick packing paper, like this.
- Basic white printer paper (optional based on how you want to load)
- Toothpicks for spreading glue
Pre-Loading Steps
- Get your bullets either by buying a similar bullet or casting your own. Wikipedia says the original loading used a 386 grain bullet with an 11mm diameter.
- I used Lee Alox Bullet Lube to lube these as there is no lube groove.
- Measure the length of your Chassepot chamber using the 1/4inch dowel.
- Close the bolt and put the dowel in until you feel it touching the exit point of the needle on the bolt. Mark the dowel at the muzzle end
- Open the bolt, put in the bullet you are using as far as it will go (you may need to use the dowel to push it in deep).
- Put your dowel back in and mark where it stops.
- You should now have two marks on your dowel that represent the overall length of the cartridge you are trying to make. Using the accurate bullet I got an overall length of 3.094 inches.
- Using a bullet you will be loading with mark on the dowel the maximum length of the cartridge, minus the length of your bullet (my bullet measured at almost exactly 1″). This represents the length of the powder charge. I got 2.059 inches.
The Loading Process
The loading process will take some time and it does require a bit of finesse. I based my process on these two posts and this video.
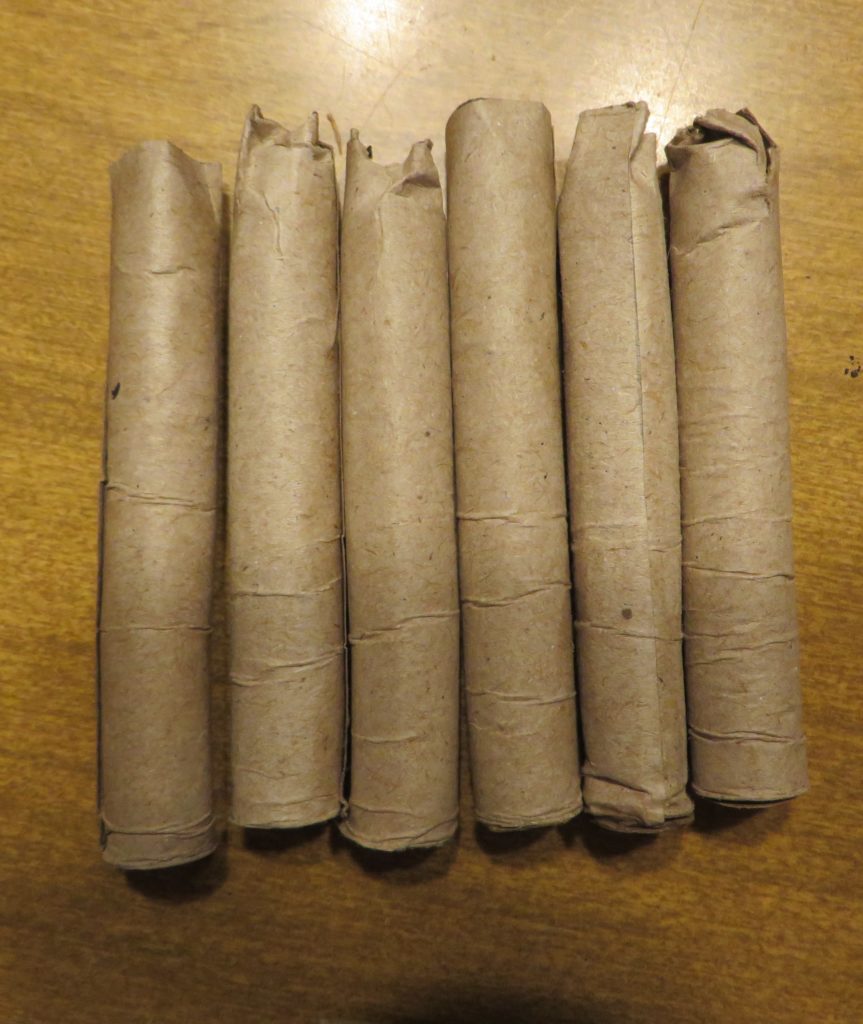
- Make a powder tube
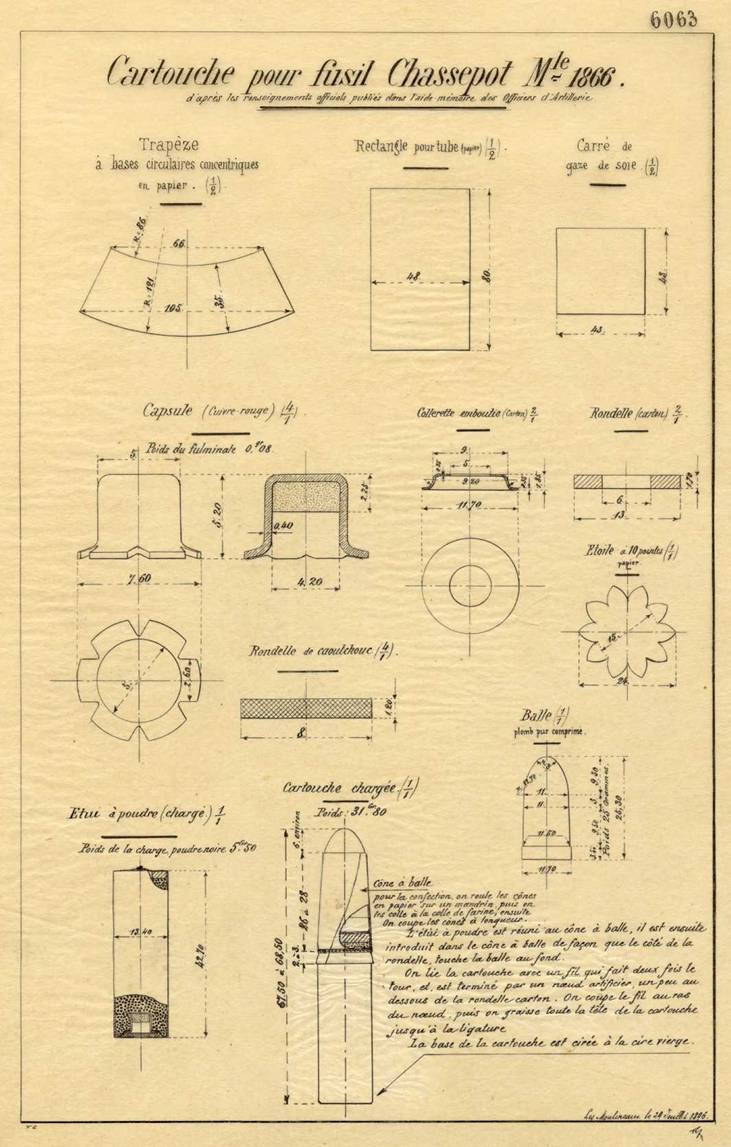
- Measure and cut out a 48mm by 80mm rectangle on your packing paper. This is based on the original cartridge diagram here.
- Use your 7/16 inch dowel to roll the paper into a tube. You want the tube to be 80mm tall. Ultimately we want a 12mm diameter tube. The 7/16 inch dowel + the width of my paper got me 12mm, but you may have to add duct tape to your dowel to increase the diameter of the resulting tube.
- Right before the two sides of the paper touch, glue the inner edge and complete the roll.
- Create an end cap for the tube. The original design uses a paper star, but I deviated here as its very had to get the star in place correctly.
- Punch out some cardboard discs for the end cap. Ideally this will match the diameter of the tube (12mm), but I only had a 7/16 punch so I used that.
- Apply glue to the the wings of the percussion cap. You can either gently dip the cap into your glue or use a toothpick
- Glue the cap, wings down, onto the cardboard.
- Apply a thin layer of glue to the inner bottom of the powder tube.
- Put the tube over the end cap, gluing the end cap (with its percussion cap) to the bottom of the tube.
- Using your measuring dowel, mark on the tube the maximum length it can be. This will be the total overall cartridge length minus the length of the bullet you are using.
- Fill the tube with black powder up to your mark.
- The original loading was 86.4 grains. I have seen as low as 66 grains. I ended up with 75 grains FFg.
- Compact the powder as best you can. If you have a drop tube you can use that. I crushed the powder with a dowel. You may wish to drill a 1/2 inch diameter hole in a block of wood to hold your tube straight while you crush the powder. You do not want the tube to break.
- If you powder is compact, but you still have space remaining add a filler like cream of wheat or poly fill to take up the extra space.
- Add another cardboard disc to top off the powder tube.
- The original design calls for the remaining powder tube to be twisted close and the excess trimmed. I had difficulty twisting the paper I used so I cut most of the remainder off leaving just enough to glue closed the top.
- Cut out a bullet wrap using the plain printer paper.
- I took the measurements from the original diagram
- Put the bullet at one end up wrap (the shorter side facing up) and wrap the bullet in paper. You should get a cone of sorts. Glue the ends together
- Combine the bullet with paper cone and the powder tube.
- The original diagram has these two parts tied together with the tie happening just under the cardboard disc you topped the tube off with. I had difficulty with this part as my string was either too big or too weak. I continue to investigate other options, but for now I just glued the edges of the cone to the tube
Alternatively, you can skip steps 8 through 11 and just cram a bullet in on top, folding the the top of the tube down to hold the bullet in place. This is the most expedient method, but you must be sure the bullet does not separate from the powder charge. Space between black powder and the bullet can be dangerous.
You now should have a cartridge that is the exact overall size you measured on your dowel. I recommend building a couple test cartridges without black powder (I used corn grits instead). If you get the length wrong the needle will not hit the cap. If you get the tube size wrong then the cartridge will not insert all the way.
Final Product
If you attempt to match the original design with the paper cone (steps 8-11) you should get something like this:
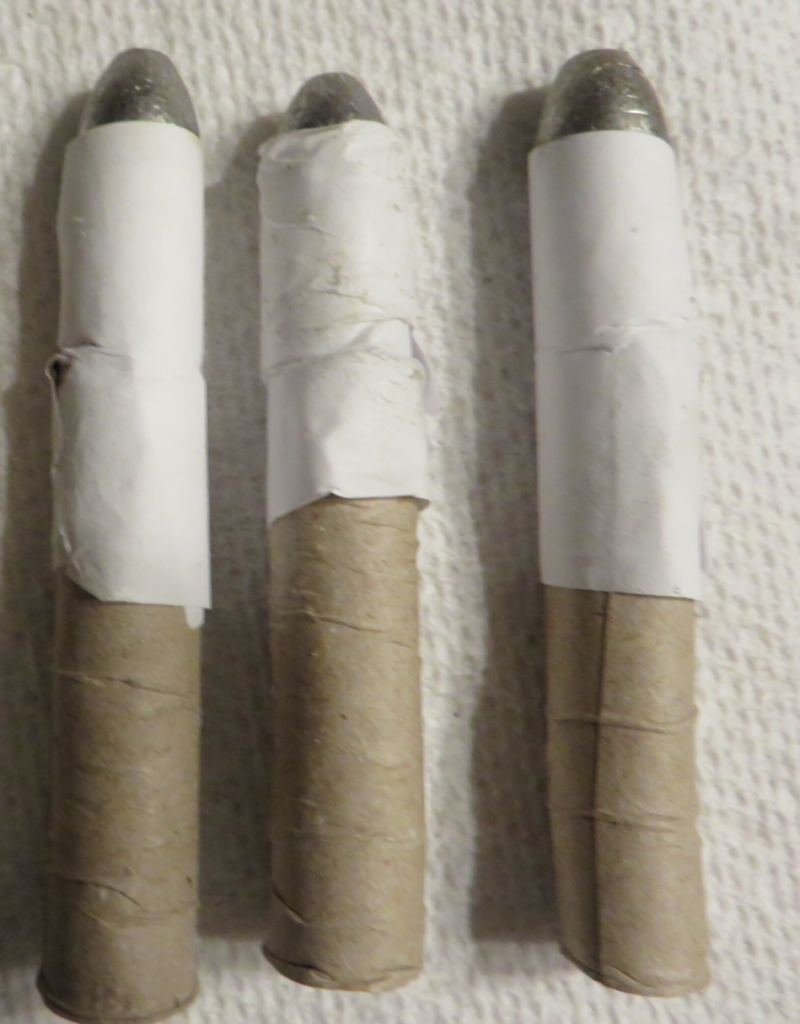
If you go with the expedient solution, you get something like this:
Shooting Results
I had mixed results. If I could get the round inserted and the bolt closed I got 100% ignition. Accuracy seems fair for a 150 year old rifle with a group of several inches at 50 yards. Occasionally not all the paper would clear the chamber and I would be left with some burnt crumbs, but usually nothing major.
That said, about 50% of my rounds fail to chamber. I usually end up with the bolt stuck with about a quarter of an inch to go. I suspect my cartridges are right on the edge of the correct size and as the chamber fouls I run out of space.
As a final note, if you are going to shoot your Chassepot I recommend replacing the bolt’s obturator and needle. If your rifle still has its obturator it has most likely hardened over the years and will be ineffective. Your needle may still work, but I would not risk having it break as I have heard they are prone to do. You can find replacement obturators and needles via Naah Tool Works.
Next Steps
I need to figure out why so many of my cartridges end up just a bit too long or too wide. To that end I need to figure out how to get more consistent paper tubes. I also want to experiment with some slightly smaller dowels and thinner paper to see if that helps.
You can follow the discussion at NorthEastShooters.